Ocean One Handheld Camera
Objective Summary
Construct a handheld camera to be used by a humanoid robotic avatar for a diver for use in deep-sea applications.
Further Background
I worked part time during the academic year and full time during the summer as the only undergraduate student in the Stanford Robotics Lab. I primarily worked on Ocean One K: the flagship project of the lab.
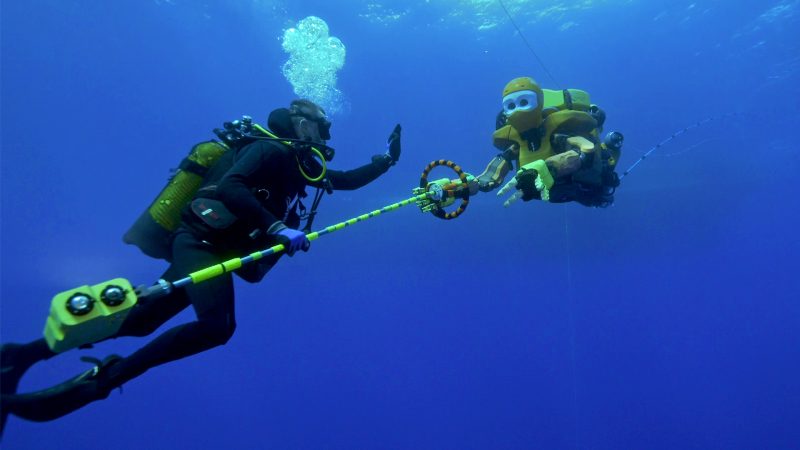
Ocean One K is an underwater robot meant for deep-sea exploration in difficult-to-access locations. Deep sea conditions have water pressures that are unsafe for human divers, so the ‘K’ in Ocean One K represents its capability to reach depths of up to one kilometer. The front half of the robot resembles the human form, with a pan-tilt actuated head with stereo vision and two arms with 7 DoF. The robot is teleoperated via a control station on a ship above the surface; commands are communicated to the robot via Ethernet tether. The robot’s grippers provide real time haptic feedback so that the operators can quite literally feel what the robot is touching.
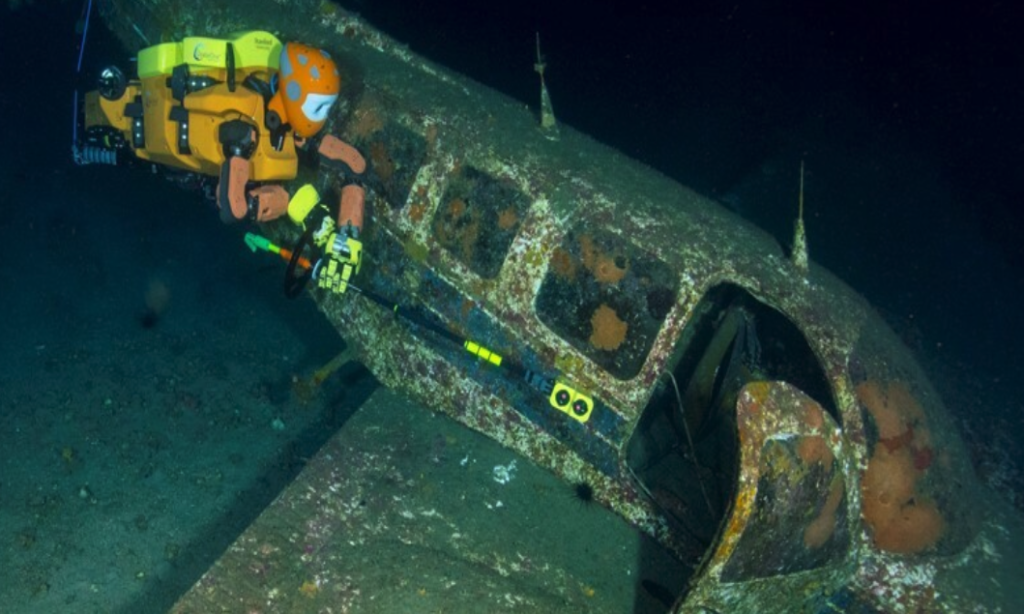
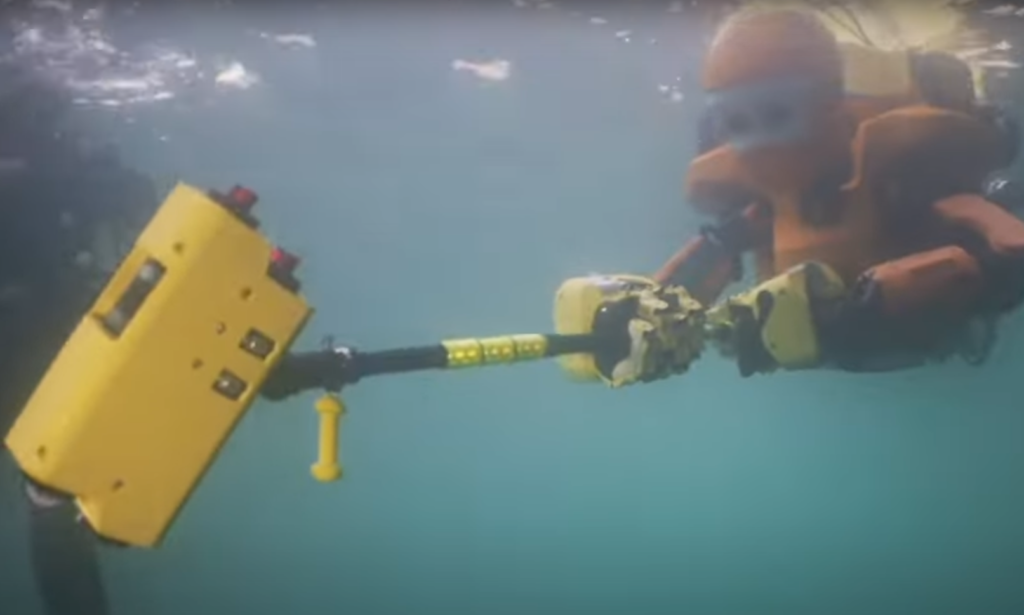
The robot’s large frame prevents it from being able to explore certain tight spaces, such as the interior of the plane wreck in the image shown below. To accommodate this shortcoming, the graduate students of the Stanford Robotics Lab previously developed a camera on a long handle (seen below) to be held by Ocean One K to allow the operators view otherwise inaccessible areas underwater. However, this first iteration of the handheld camera was quite limited in its functionality, so over the course of 8 months, I implemented a series of upgrades to the camera.
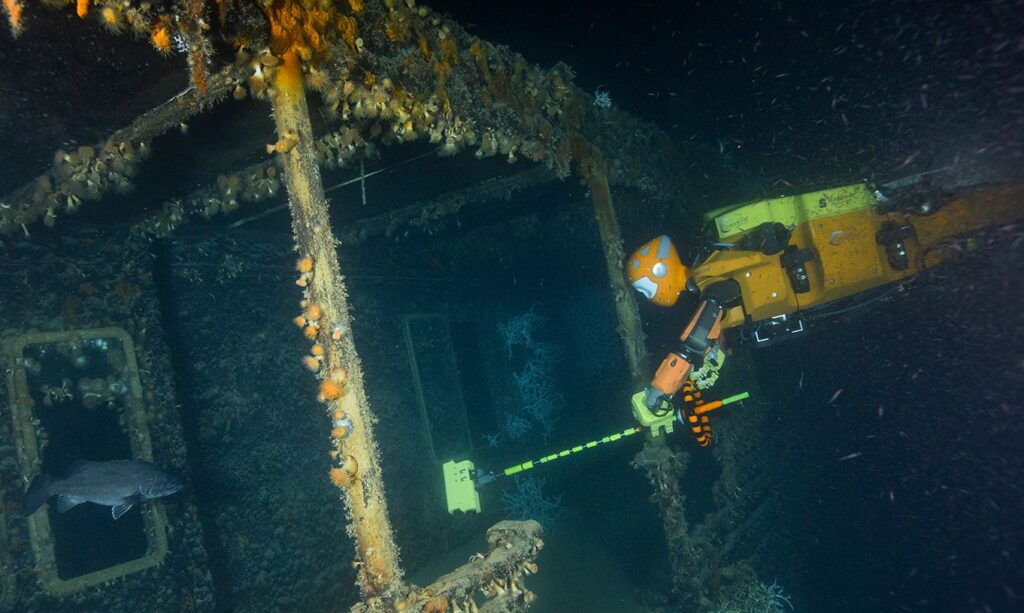
Upgrade 1: Improving Camera Startup Reliability
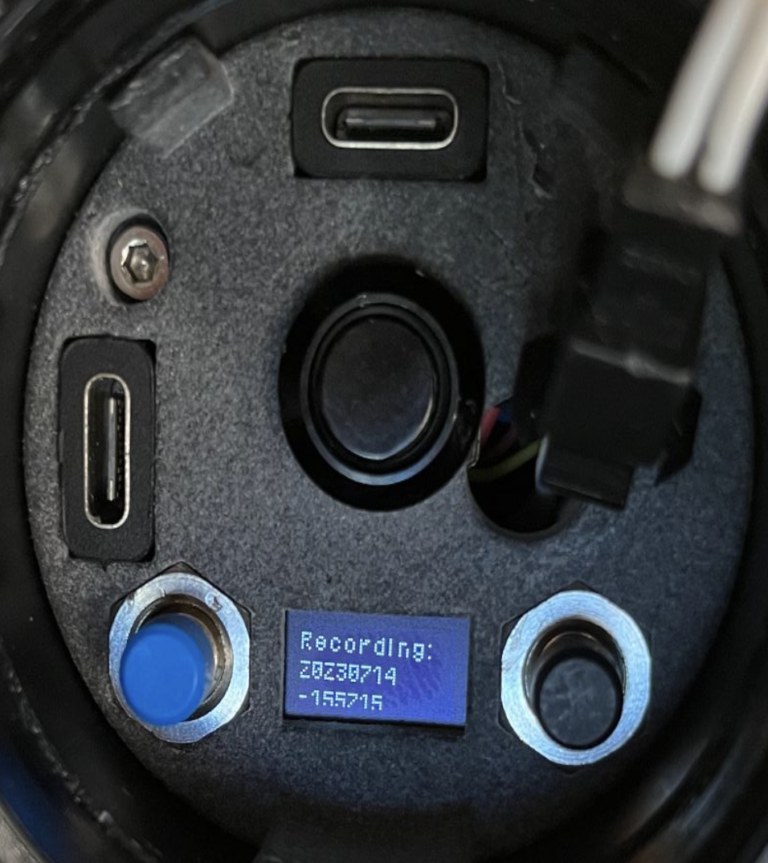
One of the previous difficulties with the camera was that it was quite unreliable upon booting up. Even when powered on, the old camera would often fail to record videos when prompted to. To resolve this issue, I implemented a menu with an OLED screen and a push button selector inside the camera housing to give the user more control in initiating the camera to start and pause recording through adding significant amount of Python code to the Raspberry Pi’s camera scripts.
The image to the right shows the mini OLED screen showing the camera’s recording status along with the filename that the current recording is being saved to on the Pi’s microSD card. The buttons to the left and right of the screen allow the user to pause and resume recordings at their will. Note: this can only be done above the surface, as operating these buttons requires opening the camera’s waterproof seal.
Upgrade 2: Underwater Lens Distortion/Blur Correction
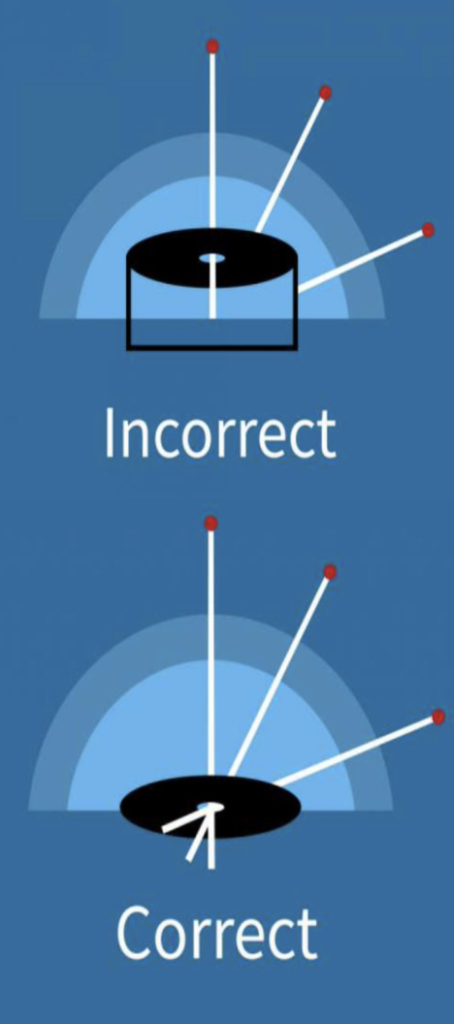
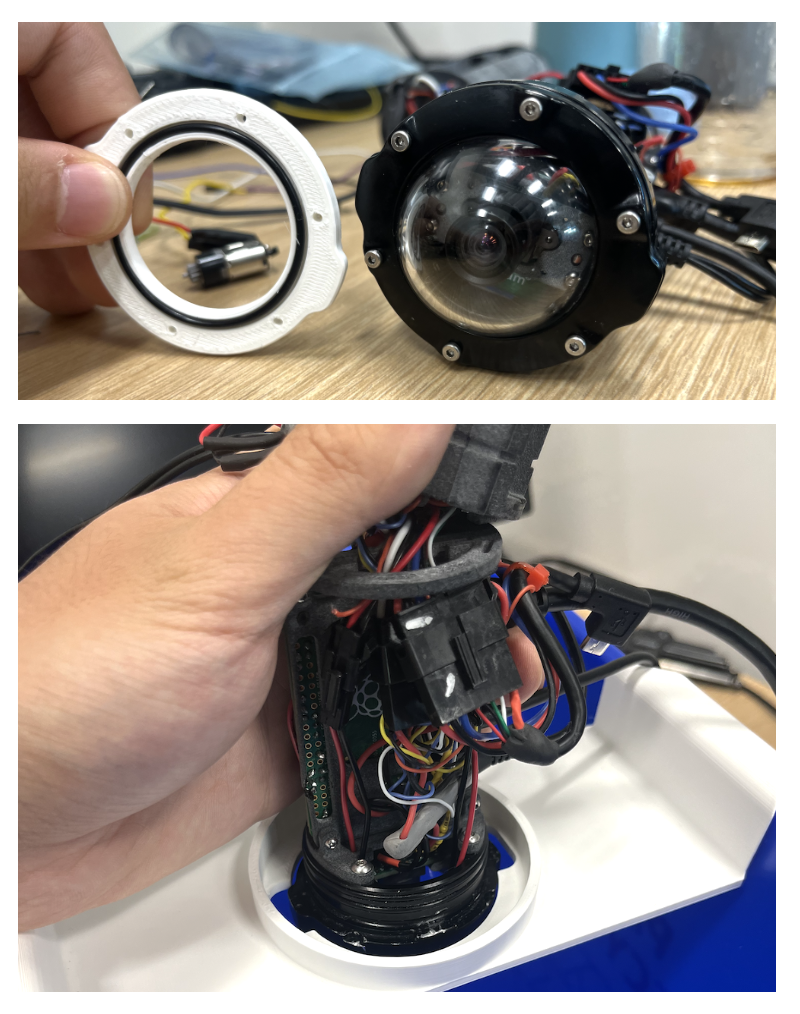
A previous issue with the camera was that the recorded footage was distorted, blurry, and overall difficult to discern. While the above-water footage was crisp, the underwater footage quality was less than poor. After consulting with some experts in underwater vision, I realized that water around the domed lens distorts the video quality if the lens is not adjusted properly (the aperture of the lens must be at the centerpoint of the sphere made by the dome). I developed a test rig to test 3D-printed spacers to separate the dome from the camera frame in order to center the aperture. After realizing that these spacers did not solve the issue, I instead re-adjusted the lens to focus within a 3-meter range underwater (at the cost of the sharpness of above water footage).
Now, underwater footage of objects within a close to medium range is crisp and clear. This video to the right shows a test of the newly focused camera in a pool test underwater. We used a checkerboard pattern to test the focus of the camera; the footage shows that the edges and corners are distinct and crisp – much more so than before. Funnily enough, gaining focus underwater results in losing focus above water. However, since this is meant to be entirely an underwater camera, that was a tradeoff I was willing to make.
Upgrade 3: Roll Stabilization
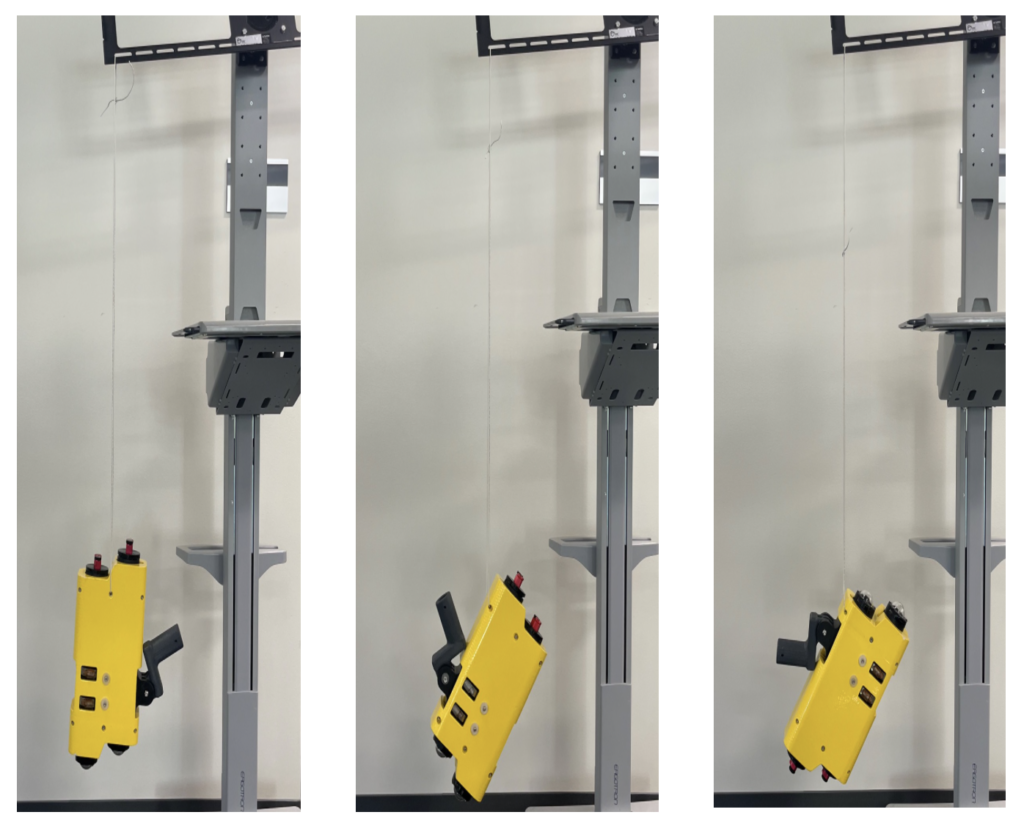
When Ocean One K holds the handle of the camera, even the slightest induced moment would often cause the camera to roll within the robot’s grasp, causing the camera to no longer point towards where the operator intended. This could be due to any number of factors, such as the slightest undersea current or a minor adjustment in the robot’s grip or hand orientation. Nonetheless, I aimed to minimize this unintentional rolling by adding targeted weights to the camera so that the center of mass and center of buoyancy coincide. Thus, no matter where the camera is pointed, it would theoretically be able to hold its position naturally without rolling to a default state.
In order to find these two critical points, I used two different methods. I found the center of mass experimentally by hanging the camera from various different positions and finding the intersection point of the vertical cords, as shown above. To find the center of buoyancy, I used Onshape CAD to find the center of mass assuming constant material properties throughout the camera model. This can be done because the center of buoyancy can be assumed to be the same as the center of mass if the entire volume of the object is substituted with water.
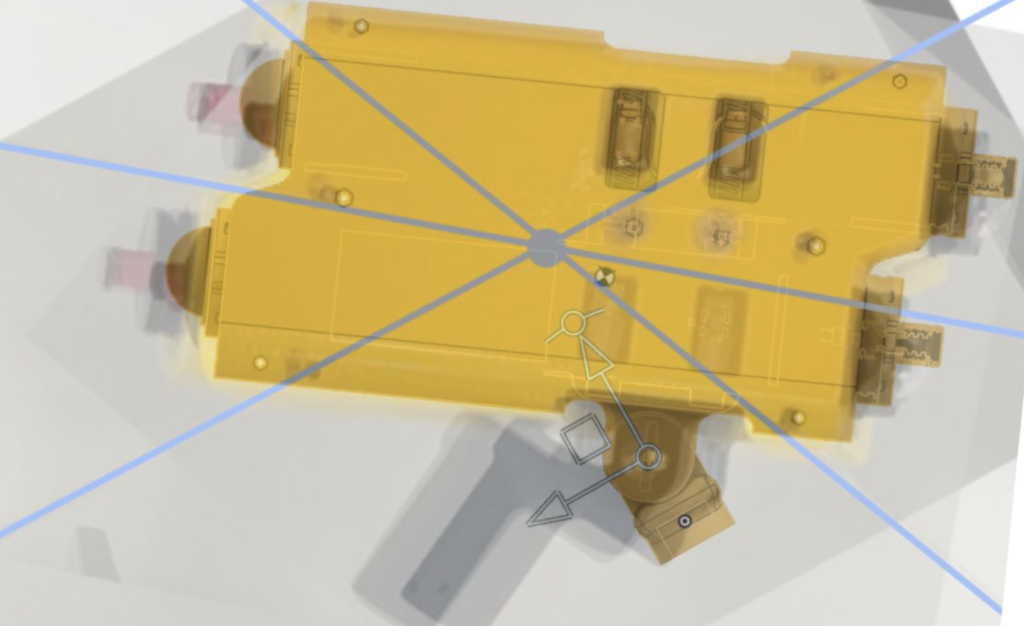
The image above shows that the center of buoyancy (checkered point) is slightly in front of the center of mass (blue point). Thus, to make the two overlap, I had to add a handful targeted 1oz iron weights to the bottom front of the camera. The video to the left demonstrates this upgrade working in action. The intention is that when the camera is dropped underwater; the camera should not roll, spin, or sink – instead, it should just hover in the water neutrally. This pool test shows this being executed to a level of fine precision. It is not perfect – but it is quite close.
Upgrade 4: Live Camera Feed Implementation
One of the most pressing challenges with the old camera was that it was impossible to view its footage in real time — the recordings were stored to an SD card which could only be retrieved after the robot surfaced.
To solve this problem, I implemented the ability to view the camera feed live. Since high-bandwidth wireless camera signals cannot penetrate water, I instead wired a micro USB cable out of the Raspberry Pi through the back capsule of the camera. This cable is adapted to ethernet before being tethered to a network switch at the surface so the operators can view the camera’s livestream over Flask. This greatly improves the operator’s perspective when controlling the robot in confined spaces underwater.
This video shows a demonstration of the live camera feed at my poster session presentation. The feed on my laptop displays directly what the camera is seeing. The diagram below shows the surprisingly complex system that enables this functionality in actual use cases for Ocean One. The Raspberry Pi records video through the camera module, and it outputs this video stream through a micro USB to ethernet cable adapter. The ethernet cable must route out of a waterproof cable penetrator out into the open water. This cable then runs into the rear electronics cylinder of Ocean One, where it plugs into a network switch and merges its live camera stream with the rest of the data that Ocean One sends to the surface. Finally, it can be streamed onto a monitor at the surface.

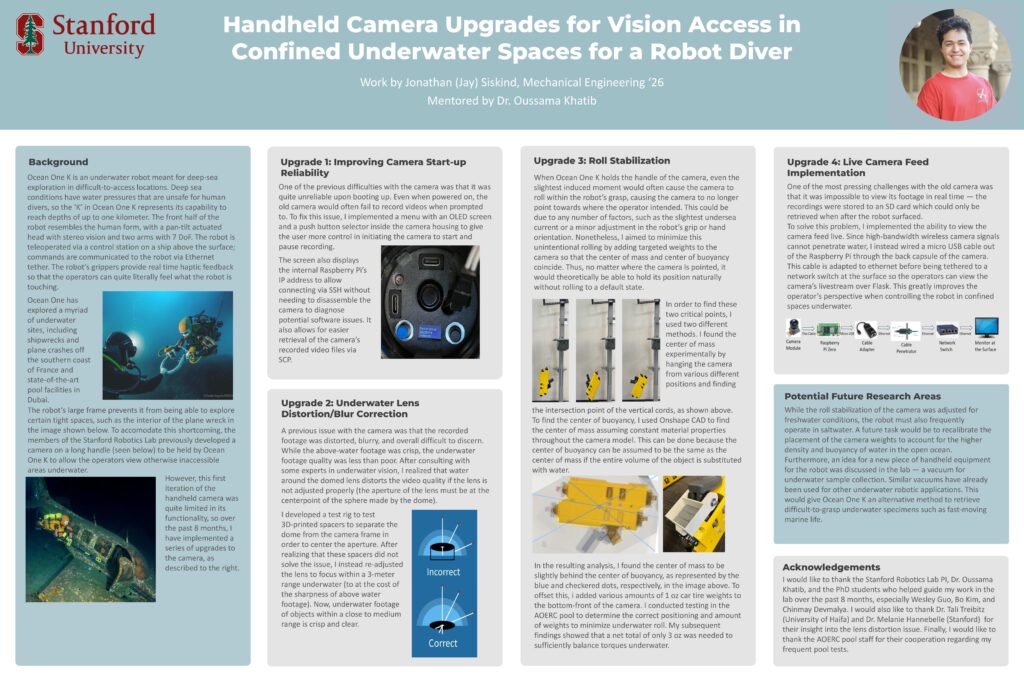
Poster
Seen below: my poster for the final CURIS summer program poster session. Most of the text is the same as what you already read above.
